Azure App Registration
You can find the App Registrations in Azure under Azure AD or directly by search. Once there you can click the “New registration” button on the top left. Then you’ll need to fill in name, account types and optionally a redirect URI.
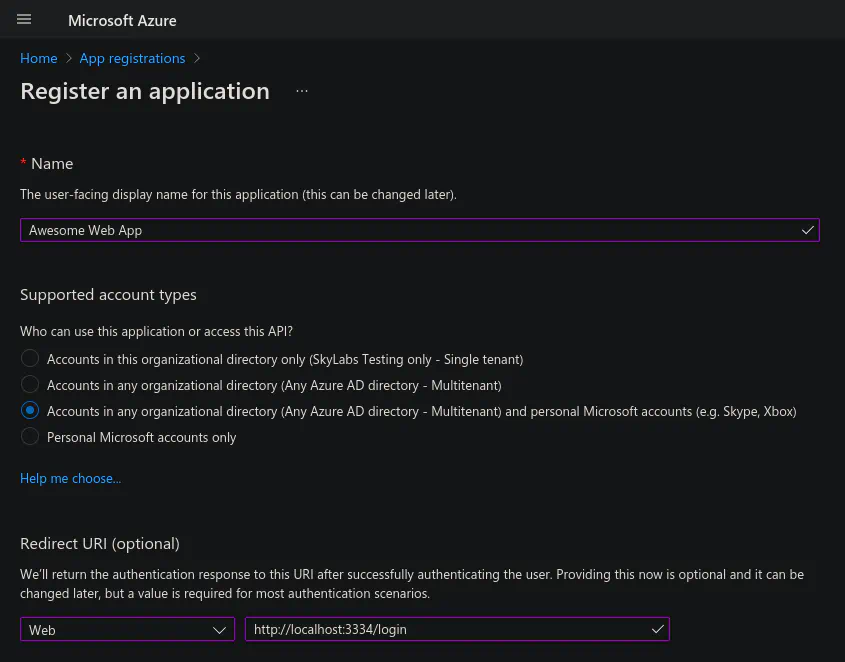
The Azure App Registration page
The first thing to do now is “Branding & properties”… haha. The app authenticates towards Microsoft with either a certificate or app secrets. So the actual first thing to do is to go over the “Authentication” tab, just check that all looks good.
Microsoft Partner Network ID
This is needed for newly created apps after 9th of November 2020 to prevent abuse. For this you’ll need to add a “verified publisher domain” to the Azure Active Directory. This is the same as “Custom domain names” in Azure AD. They’re usually added by TXT or MX DNS records. But may be added pretty easily with a simple .well-known/ HTTP challenge. Although when doing the HTTP challenge the domain won’t become a custom domain name for the Azure AD tenant. But rather bound to the specific app in question.
After that the actual MPN ID comes from the MPN, Microsoft Partner Network. To get it you’ll need to go to the Microsoft Partner Center and register your organization. You’ll get verified after a week or two and then able to find this MPN ID under Account settings > Organization profile > Identifiers in the Microsoft Partner Center.
If you ever need to do this then this may be very useful.
Certificates & secrets
After that go to “Certificates & secrets”. Microsoft always recommends using certificates for getting access codes. But the normal secrets are easier to configure.
Using certificates is the best if your app has good support so that all you need to do is download a cert from the server and upload that to Azure. So either do that or add a “New client secret”. The client secrets will have both the secret and an id, both are needed for authorization. When you create these you’ll need to store them safely and put them wherever the app gets them from.
API permissions
And the last thing we need to configure in Azure are the API permissions for the app. When adding a permission for the app you’ll first need to choose what API you need access to. And then what permissions that are needed for that API. For apps that integrate with Microsoft services the “Microsoft Graph” API is likely where you’ll find most needed permissions. There is also the difference of “Application” and “Delegated” permissions. The Application permissions is for the app itself and need to be granted by the owner of the app. Whereas Delegated permissions are the ones that add stuff to the consent form, these lets the app do API requests on behalf of the end user and need to be granted by the end user or through admin consent.
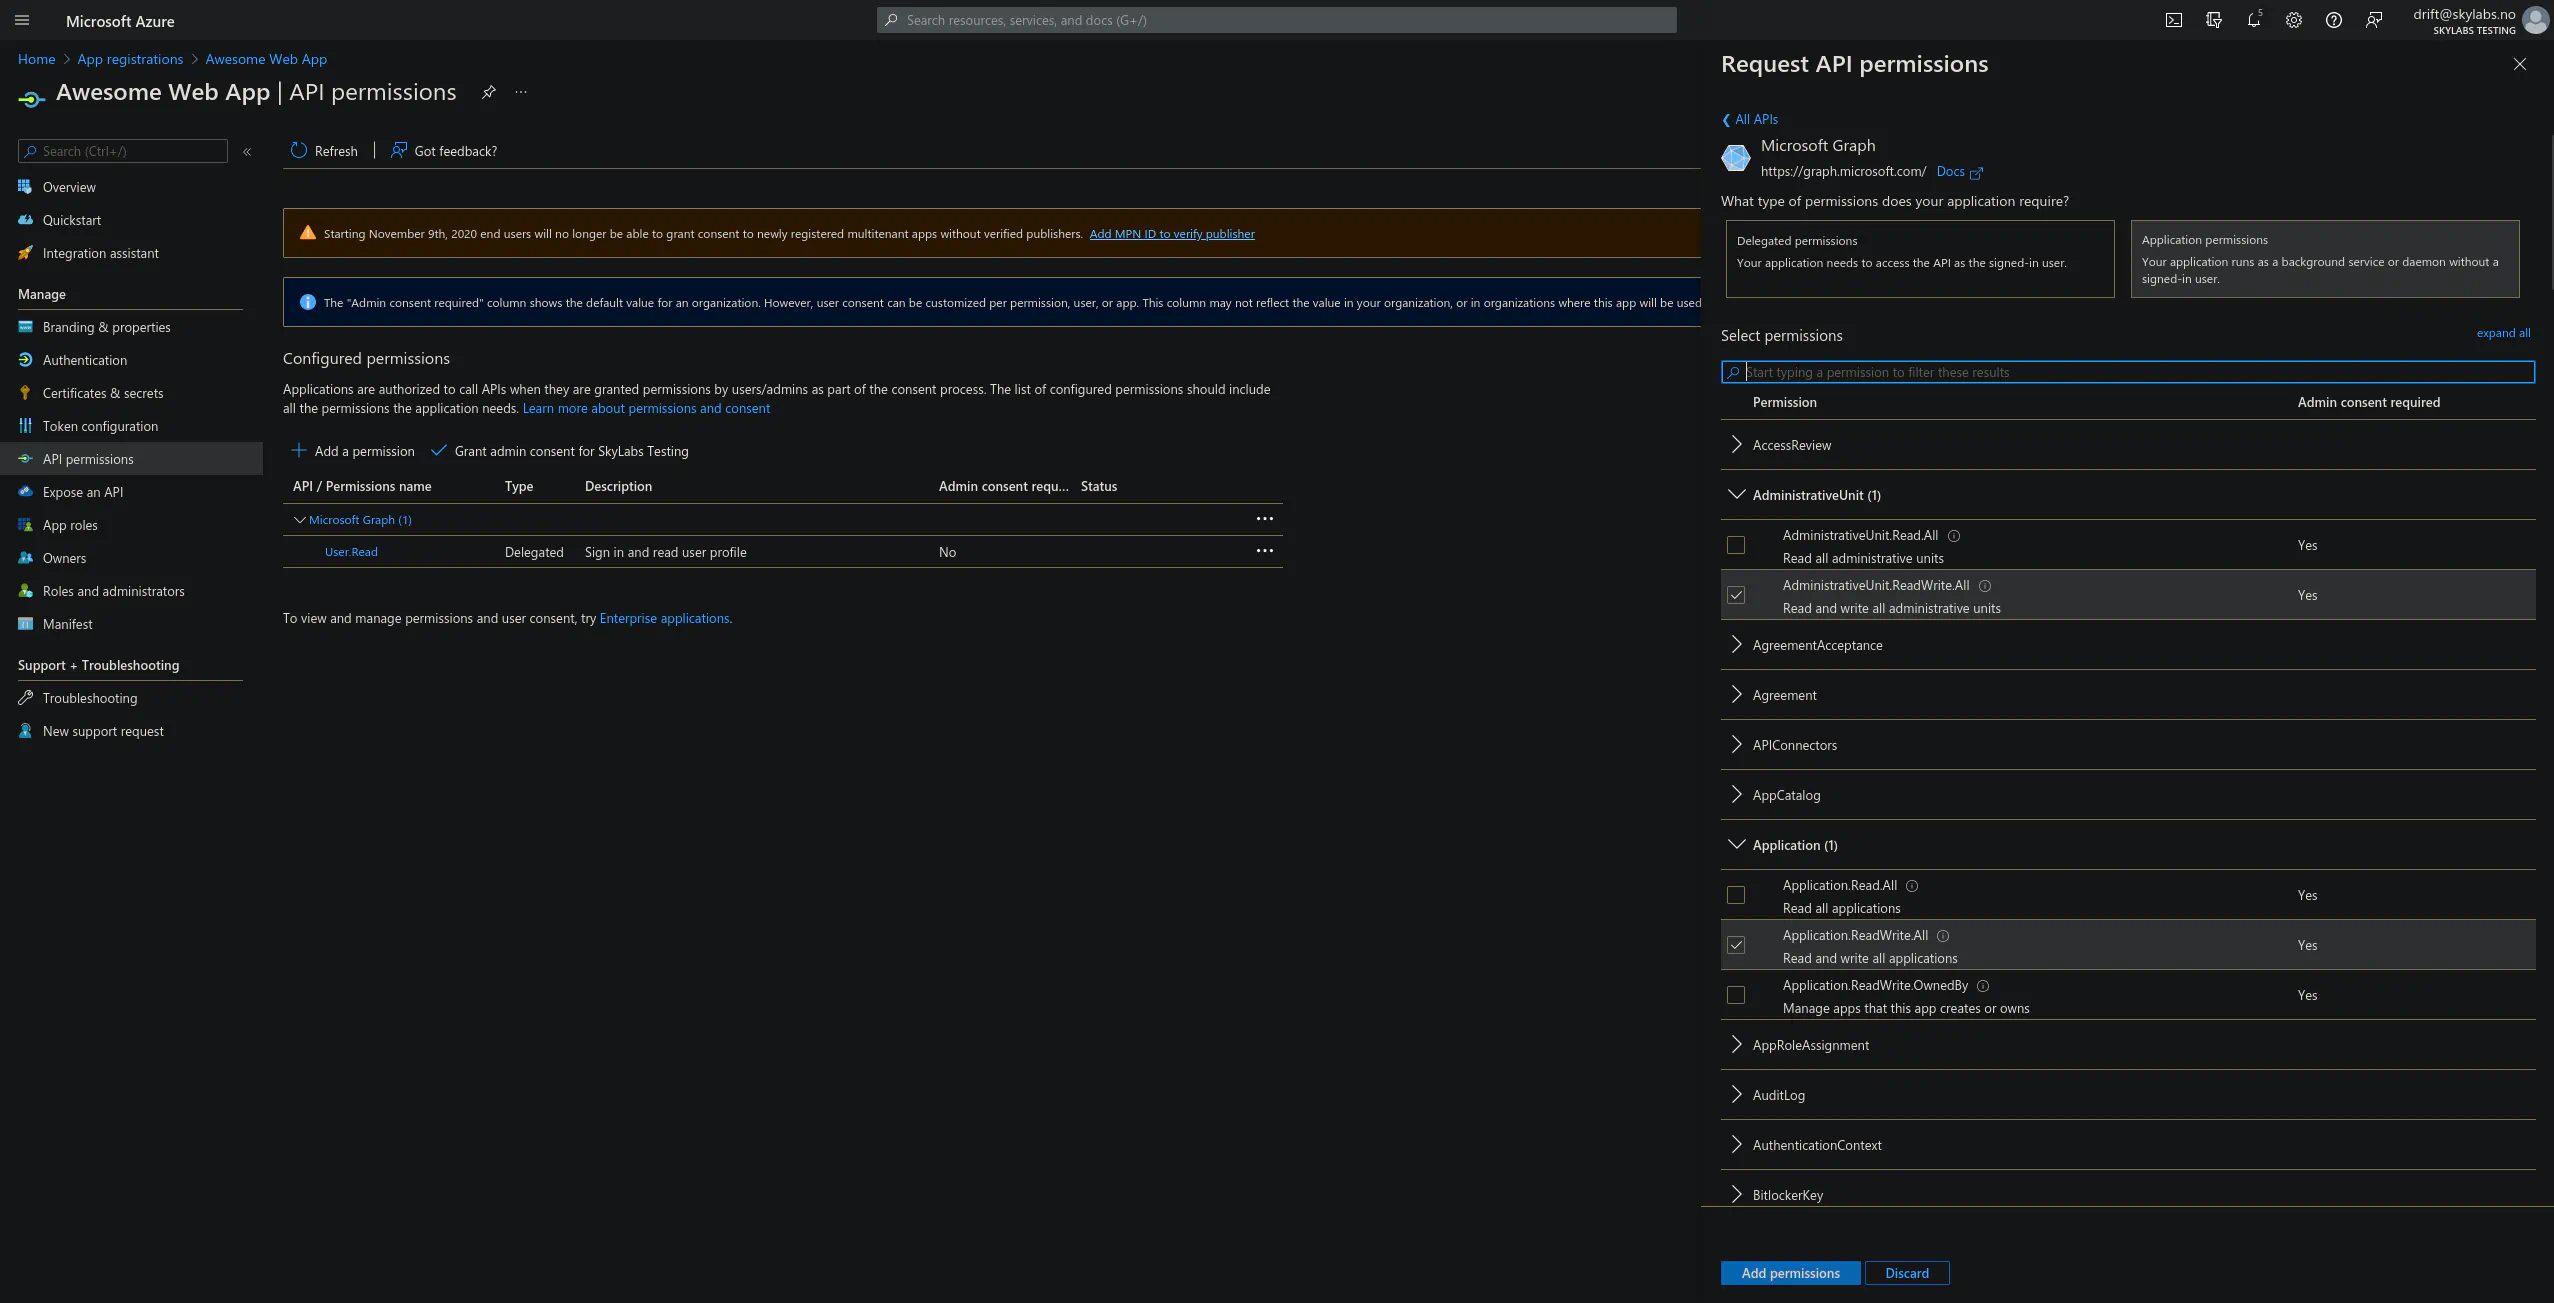
Azure API permissions
Service principals
Now to the hard part I guess. You’ll need a “service principal” for the app in your tenant to authenticate with it. This will get created on first login if it’s not done already. Automatic creation happens when you get that consent thing after logging in telling the end user what permissions the app requires. If it’s a tenant admin that’s logging in that person may click the check for granting the permissions “On behalf of Organization, this is “admin consent” and makes it so individual users in that tenant don’t need to consent when logging in.
Small and simple powershell script for adding the “service principal” to a tenant;
|
|
After the service principal is created in the Azure AD tenant with users that’s going to consume the app. Admins may set “App Roles” per user under “Enterprise Applications” in Azure.